
Cottage Reno
Guest cottage – painting the ceiling
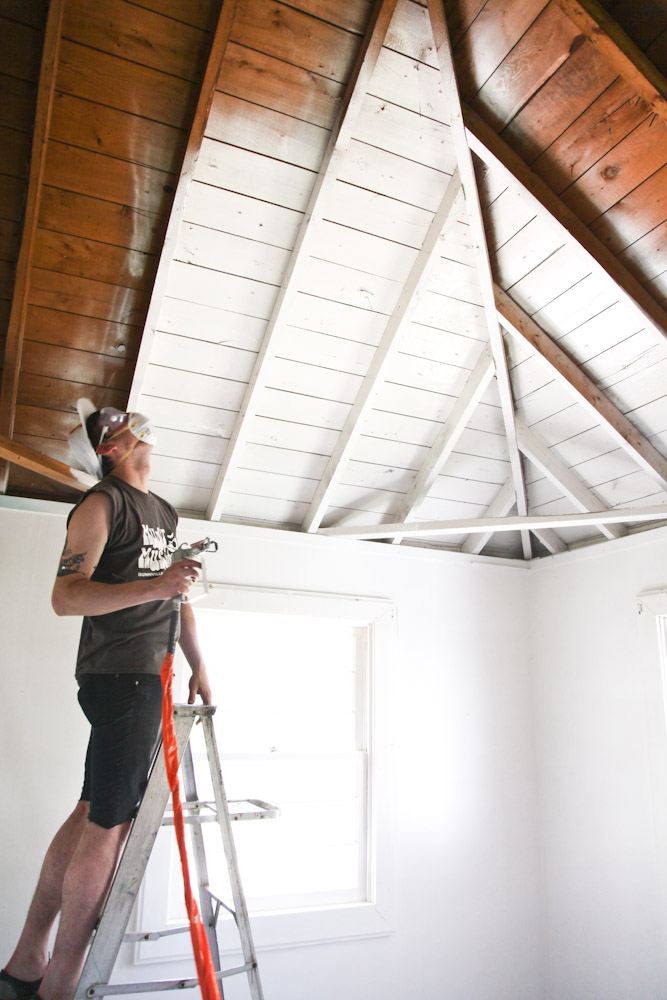
Another Thursday and we’re crossing a lot of the big ones off of our “to-do list”. This time around we had to rent a paint sprayer and paint the entire wood ceiling (although nice, the back cottage tends toward dark and dank). We didn’t know whether or not we needed to use primer so we purchased 10 gallons of the 2 in 1 paint and primer in an egg shell cloud white. The same paint we used on the water front cottage, and even the store.
You may remember that last time around we rented the sprayer but got freaked out because the ceilings were too high so we ended up having to hire someone. Glad this time we were able to do it ourselves! Also, here’s a flashback to when we first took down the old drop ceiling!
Outfitted with white painter hats, goggles, and face masks we started painting in the corner room to perfect our painting method before moving into the living room.
We were really motivated to get the painting done in one day, so we really hustled. The amount of over spray is pretty incredible so covering all of the floor surfaces in the living room was essential.
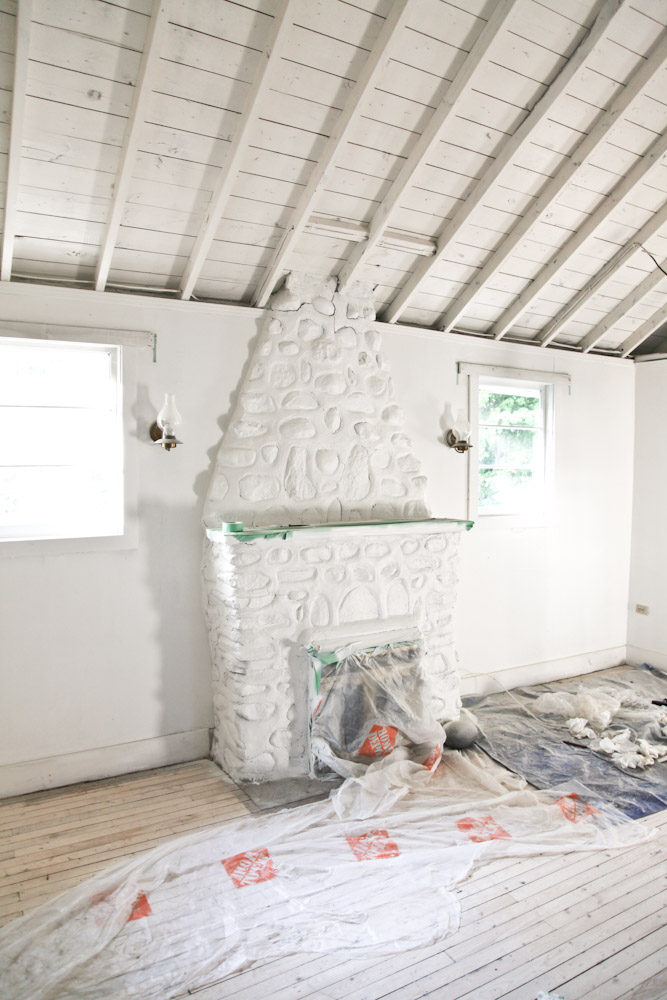
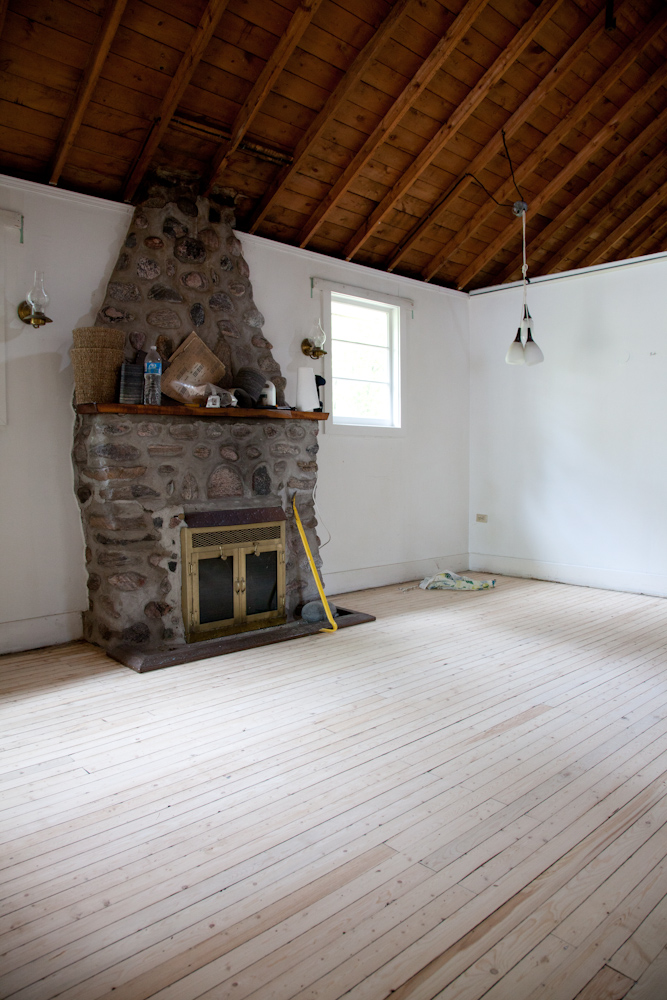
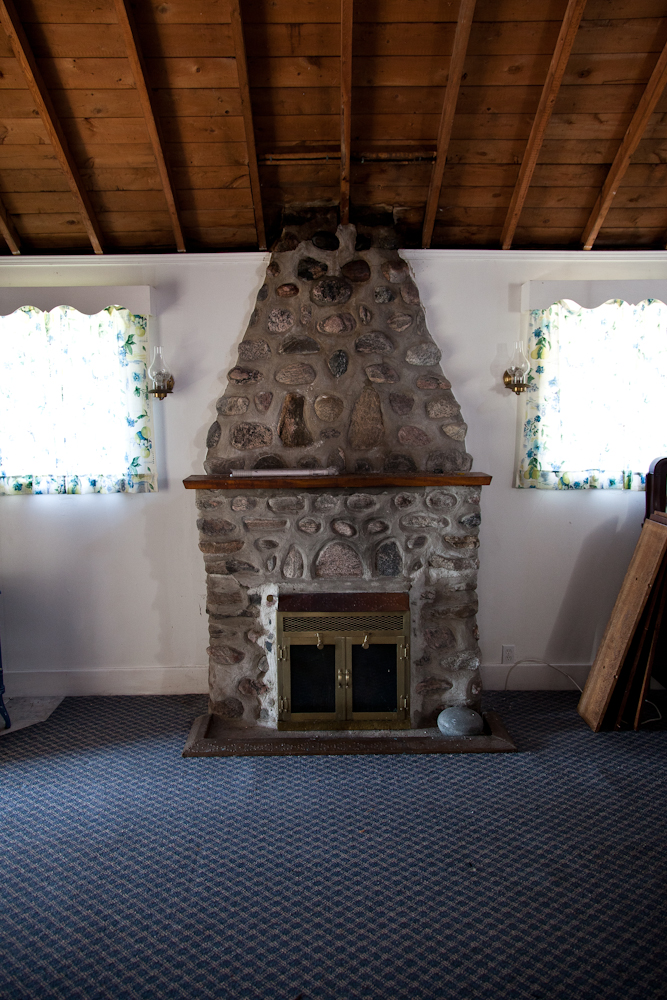
The fireplace was pretty terrifying to paint but in the end I think it looks really clean and bright.
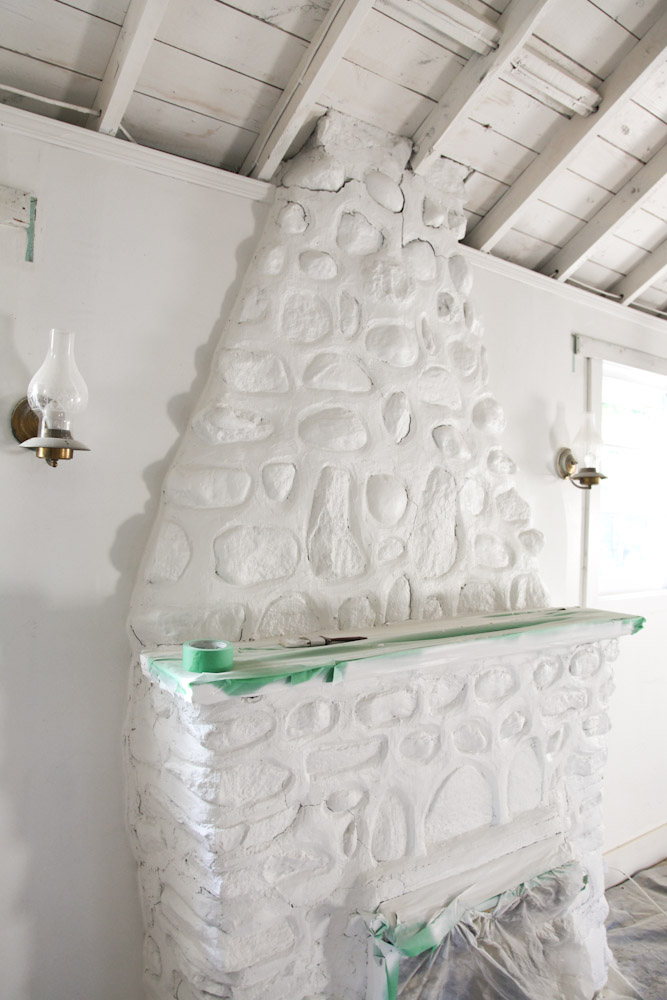
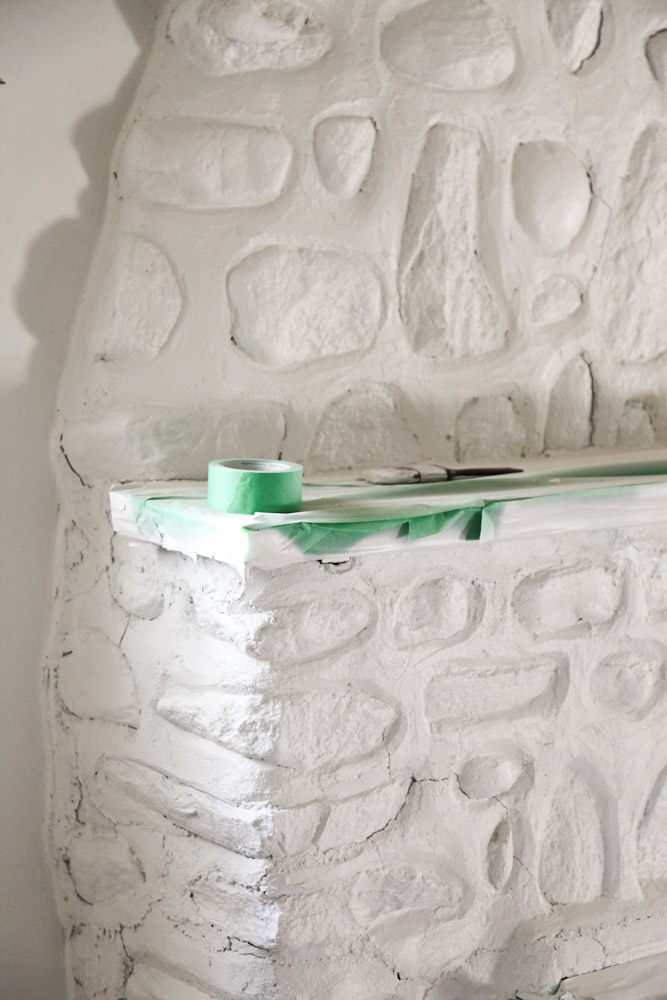
This is definitely inspired by the white plastered fireplaces that Alvar Aalto made, and although we only painted the surface it still has the same effect. When all of the tape is gone exposing the old wood shelf, and the brass and copper fireplace the contrast is going to look really nice. You’ll have to wait until next week to see that!

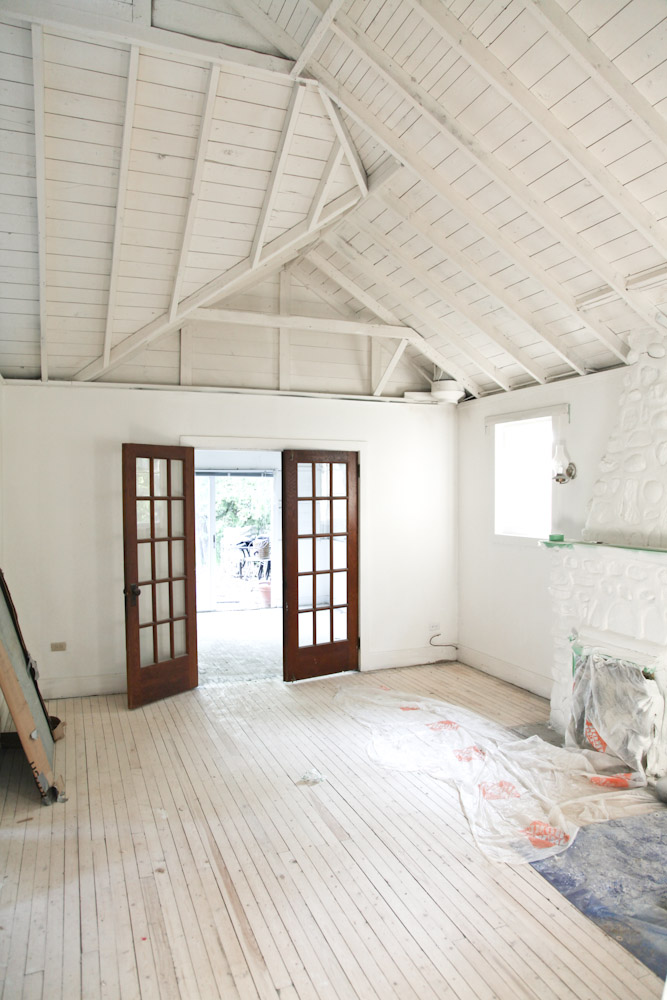
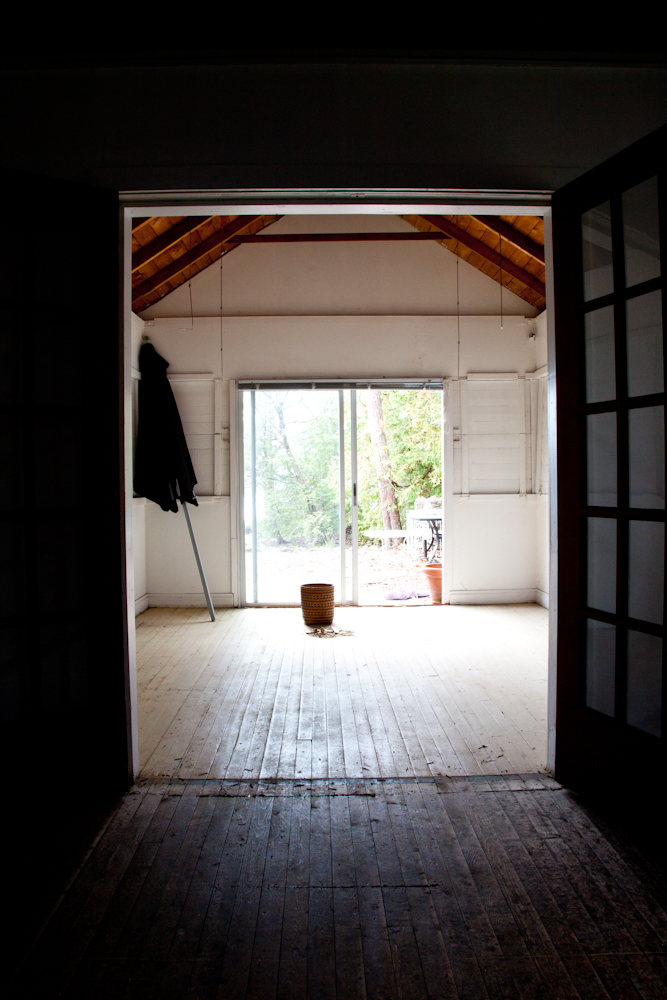
Here is the porch room – so much brighter! We discovered that the floor in here was already painted white but it’ll get a fresh coat next week.
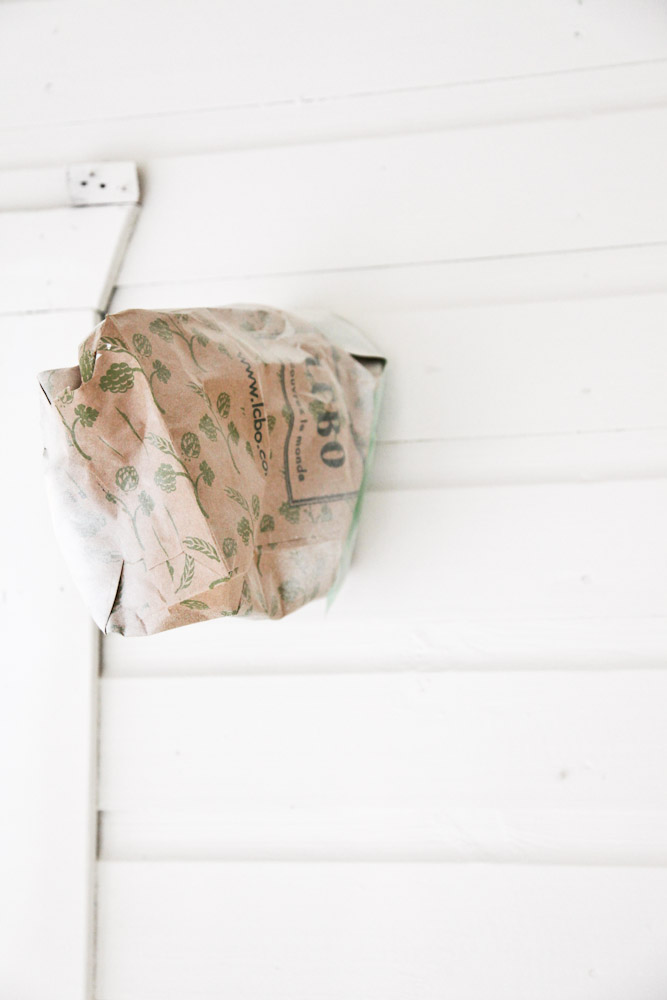
LCBO paper bags protecting the old copper sconces from paint.
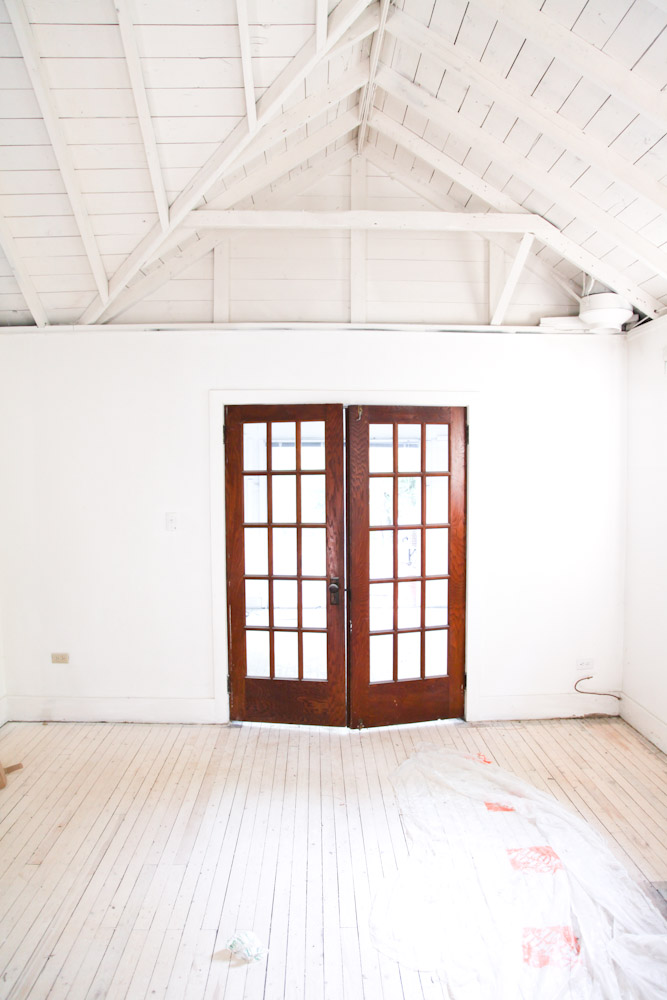
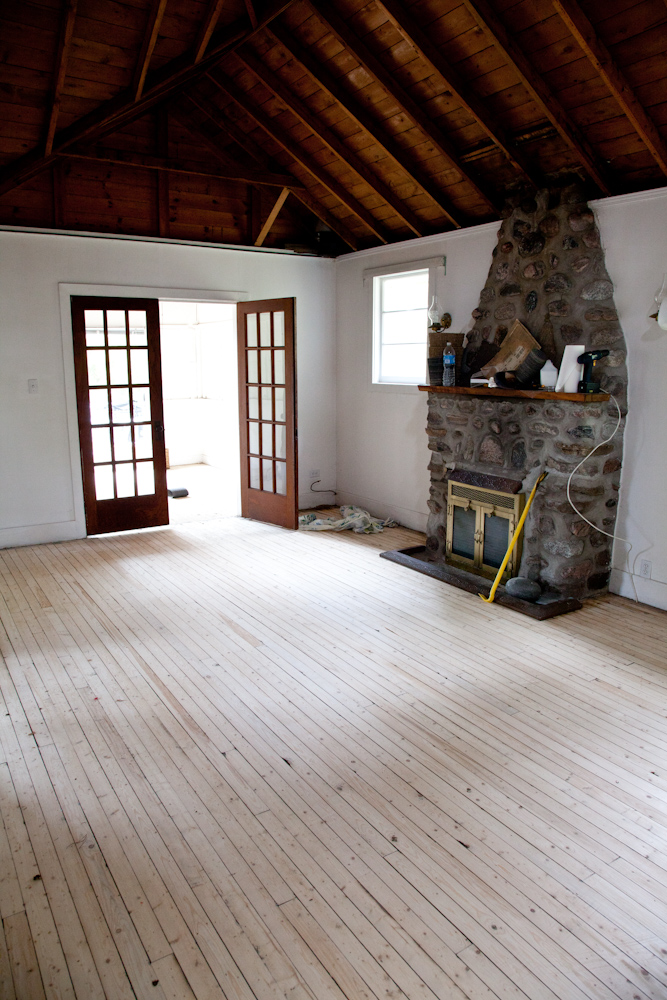
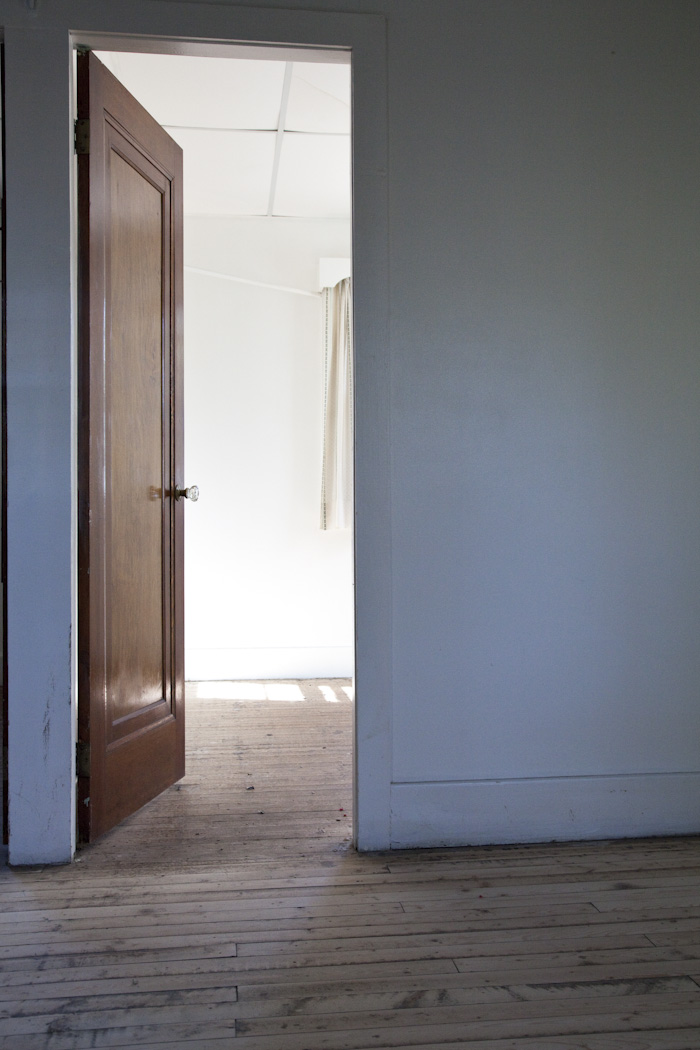
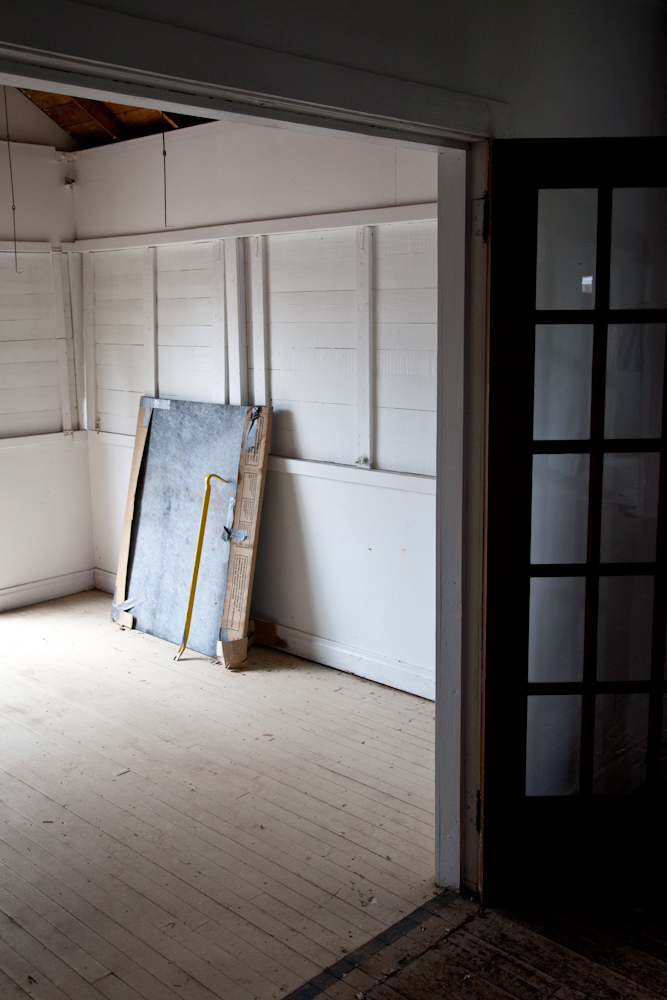
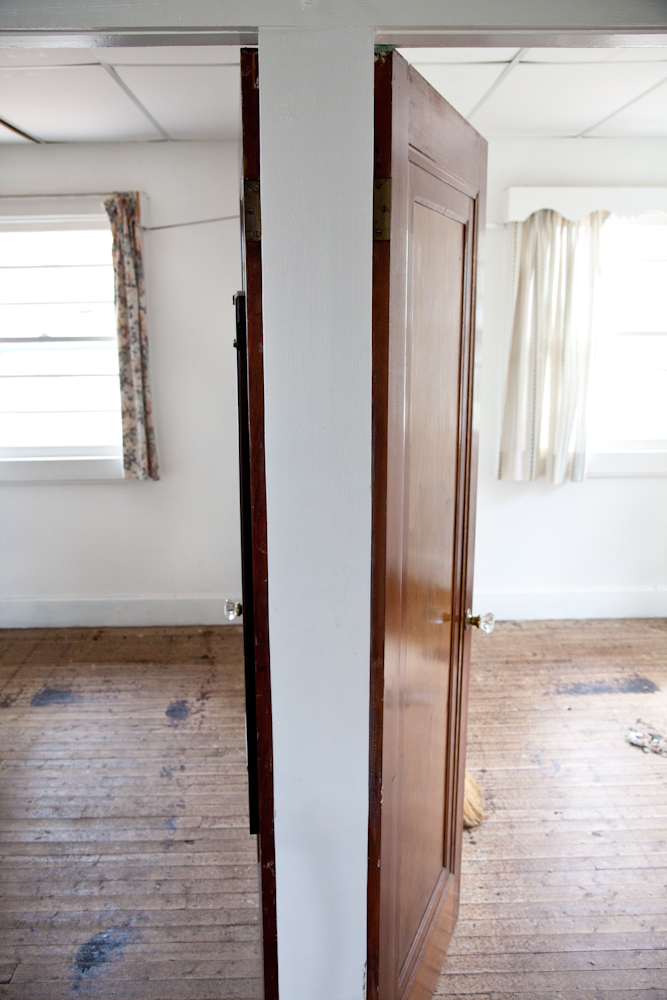
The original doors in the cottage were off limits for painting, but these french doors actually look quite appropriate with the pale floors and white ceiling.
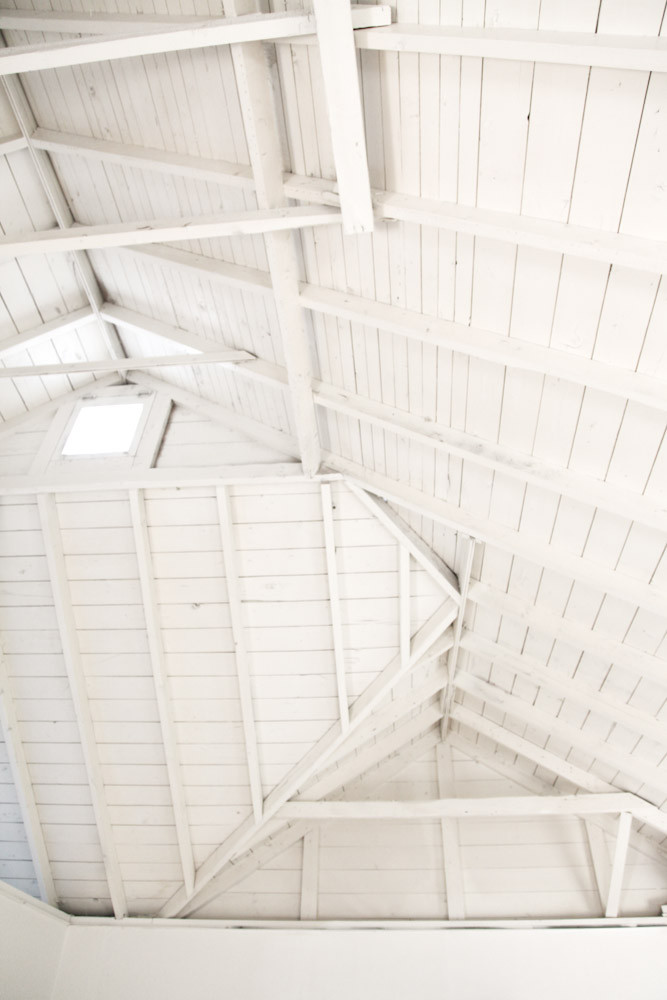
You might not have noticed in the old photographs but some of the beams were made of different pieces of wood (added as extra reinforcement against snow way back when the snow was so deep it reached the eaves) so now that they have all been white washed the ceiling looks cohesive and you can appreciate the architecture even more.
Next week our friend Dan from Hindsvik is supposed to come up with us to do one last push to get this cottage in order before furnishing it, so stay tuned for some bromance next week.
Guest Cottage – Successful sanding
I hope everyone is enjoying the long weekend. Our weekend started Thursday morning when we took off to the cottage for two days, unfortunately we had to come back to work for the weekend. This time we rented the correct sanders and spent day one working on the floors, finally getting them completely flat.
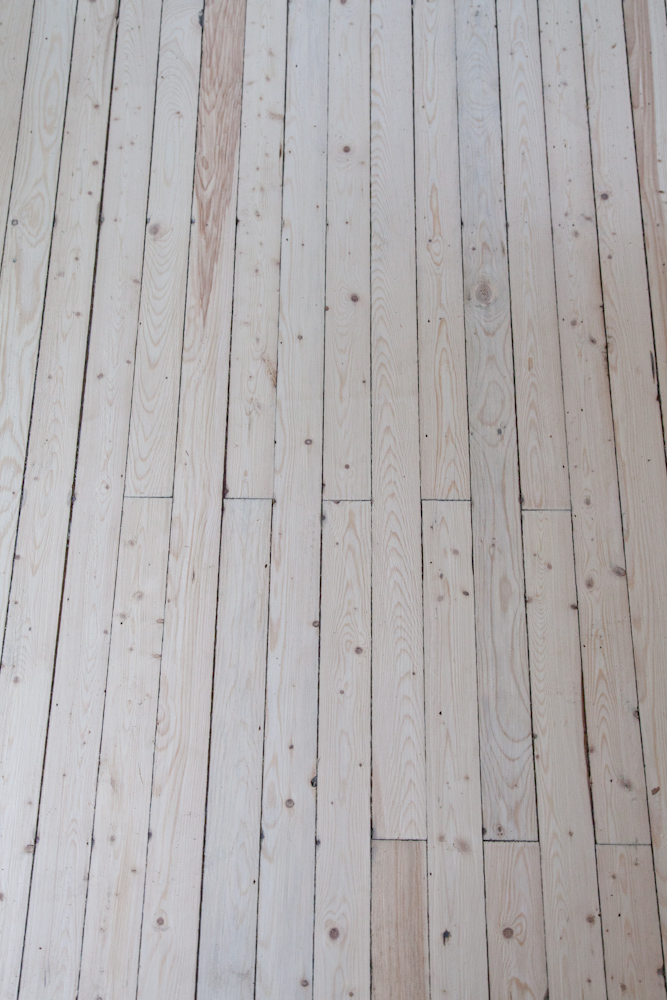
Success at last! We haven’t finished the floors yet, but we’re going to do that this week.
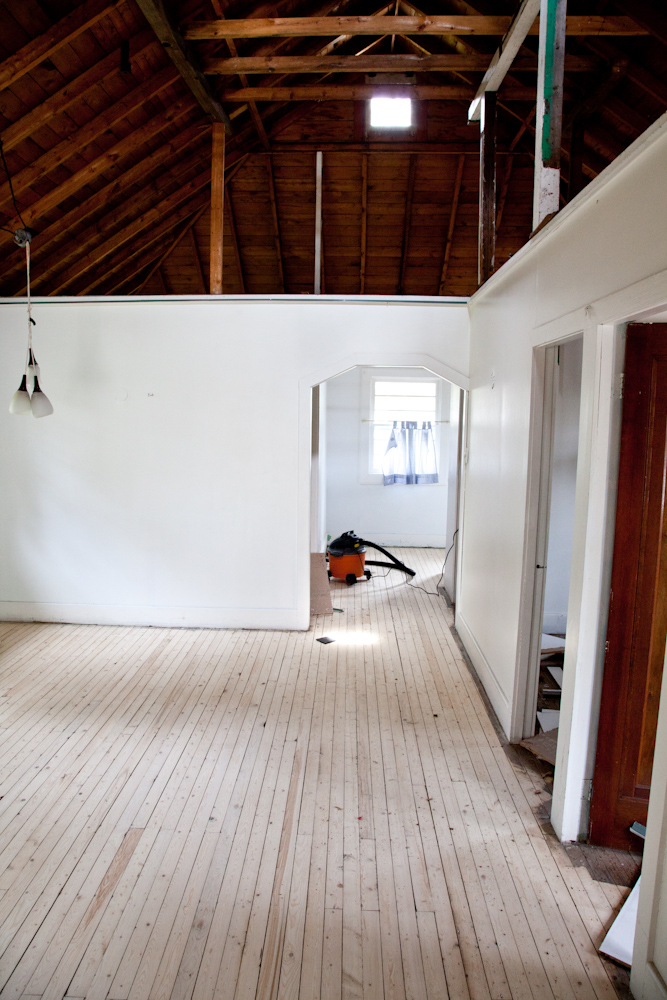
It’s so nice to see the lines of the floors continue all the wall down the hallway into the kitchen.
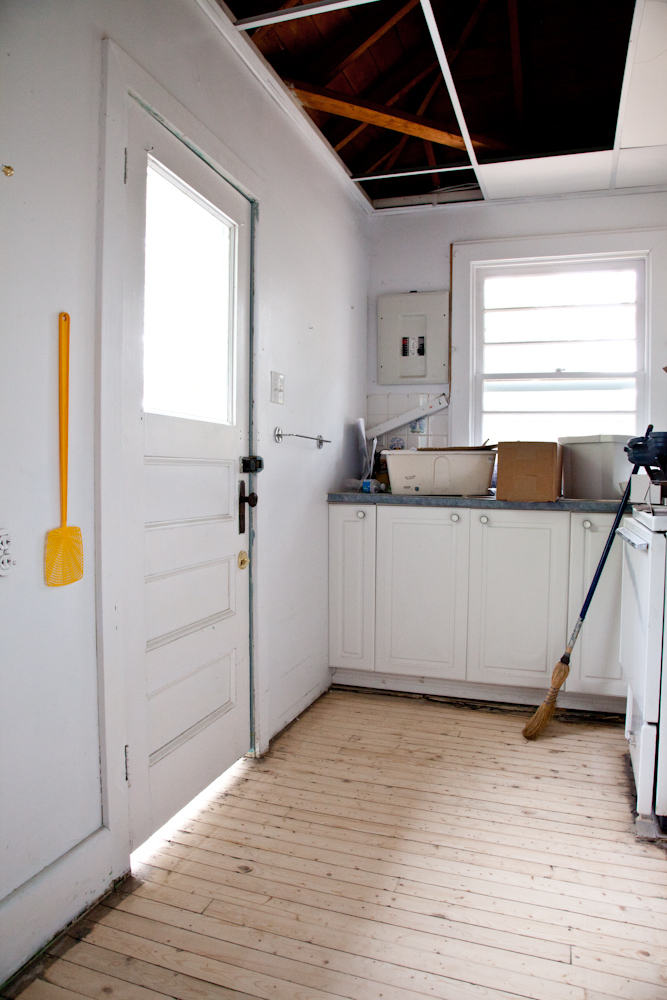
We took down the large cupboard on the left of the window that was actually installed to hide the electrical panel. It was sticking out much too far, and making the kitchen feel cramped. I think I’ll make a little shallow box with hinges to hide the panel.
We also brought up the ceramic sink and white faucet from our old apartment, and making another plywood counter to install in this kitchen. Plywood is really easy to work with because you don’t need to laminate any of the wood as with most solid wood counter-tops. I have to admit, plywood isn’t the most durable material for a counter-top but if you add enough lacquer it holds up in a space that is used part time.
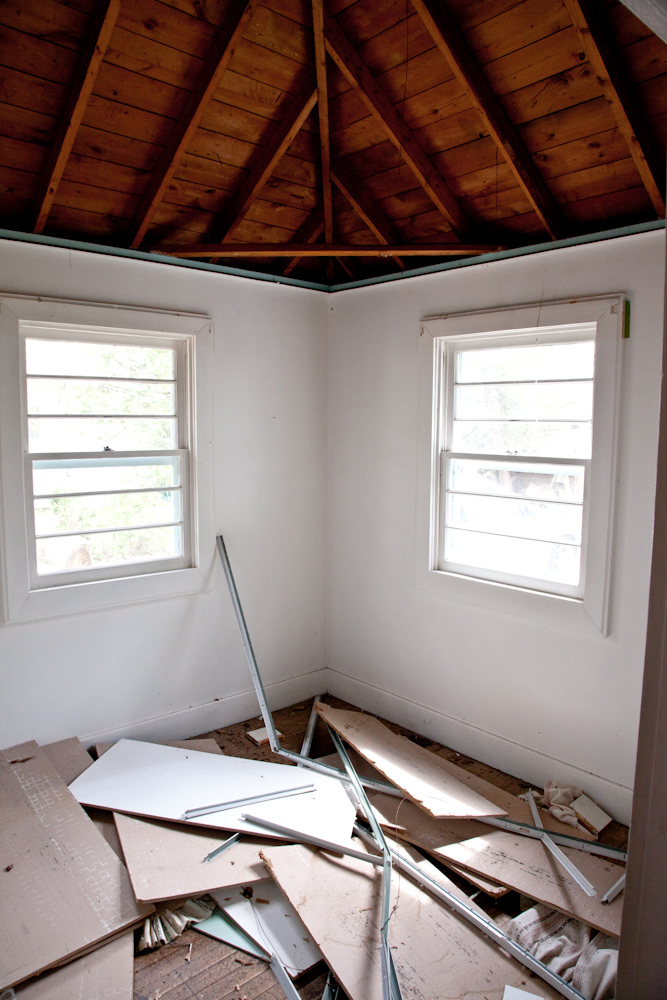
Just to get crazy before I left, I took down the old 70s office drop ceiling. I just whacked the metal hangers with a crowbar. Thinking back to it I’m happy I didn’t injure myself during the swinging. I did accidentally destroy a wall sconce, but thankfully those were going to be replaced anyways.
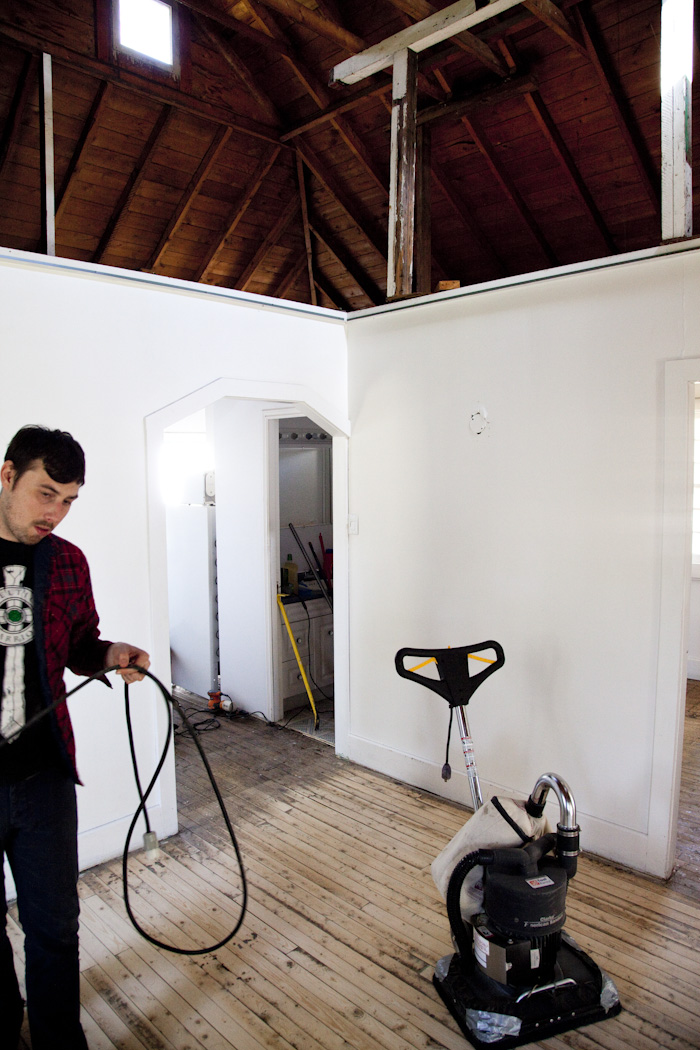
We decided to leave the exposed ceilings, they look so cool and add height to the small bedrooms. If down the road we want to make it more private I can always add a ceiling.

I had to end with this photo because I can already hear cries in the internet world after we paint the ceiling and fireplace white. To be honest I do sometimes consider keeping the wood ceilings as is, but all I have to do is go into the main cottage and see how clean and bright everything looks in white. From the photos I took you can’t really see the amount of water damage of the wood ceiling, nor can you appreciate the heavy feeling you get when you have a dark wood over head with light floors and white walls. It just feels unbalanced. Also, there aren’t many windows in this cottage so natural light is limited – the white will help to amp it up.
This week is going to be a good one if we can get most of the painting finished!
Guest cottage – sanding disaster

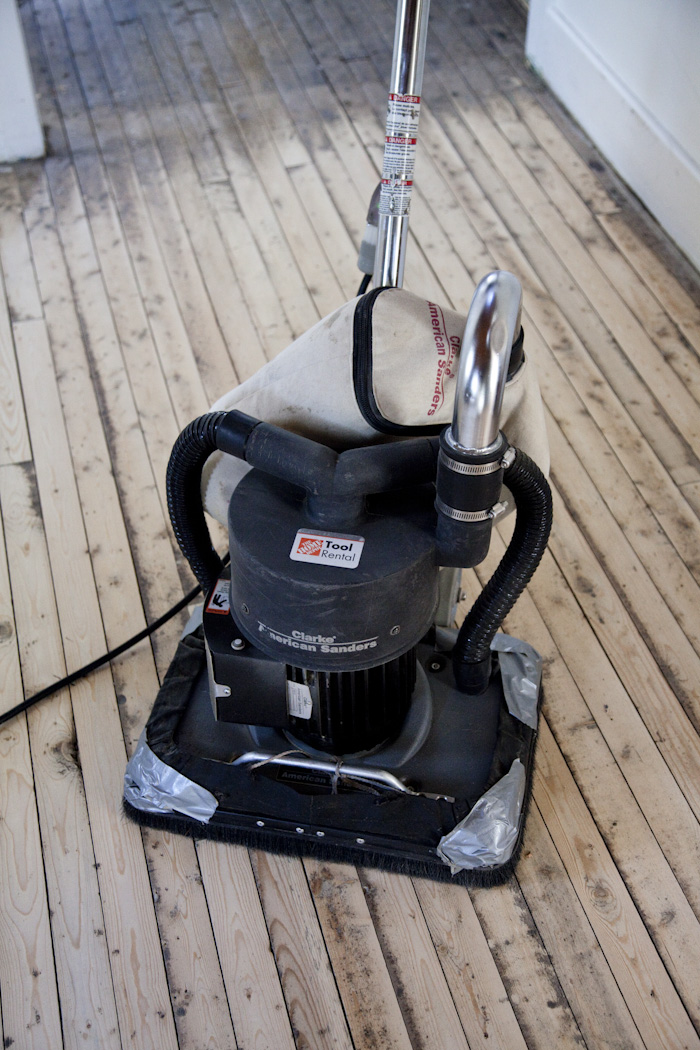
We never got around to doing our cottage update, simply because we didn’t have the most successful day renovating. We started by renting a couple of sanders to refinish the original stained pine floors. Unfortunately we listened to the advice of the Home Depot employee and took these ridiculously useless sanders, which acted more like vacuum cleaners with sand paper attached to the bottom.
The sanders might have done a decent job if the floors we perfectly even, but after 70 years of wear the floors were cupping. Basically meaning we would have to sand down the raised edges in order to get the grime in the middle of the board. There is a specific sander for this specific job, a drum sander which is the one I originally wanted.
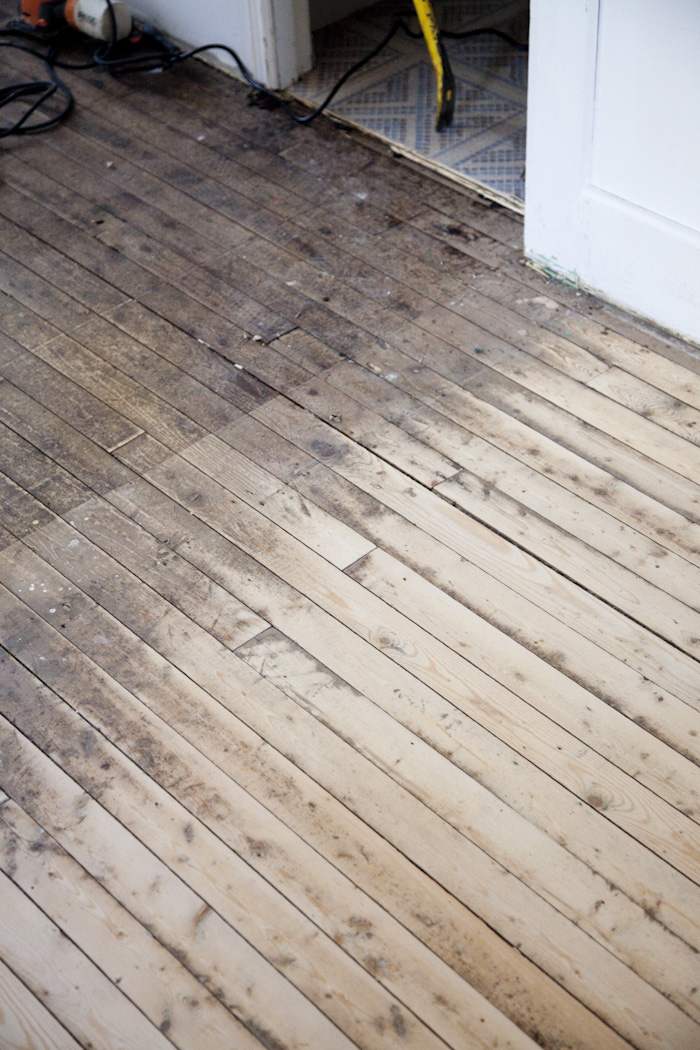
You can really see the difference here.
So this Thursday we’re up again, but this time with drum sanders. The amount of work is pretty intense, so we might end up painting the bedroom floors white. The floors for the most part will be covered with beds and rag rugs so why make more work than necessary?
This week the whole family is going up to the cottage to enjoy the nice weather. I hope everyone has a wonderful long weekend!
Guest cottage renovation, week two
Yesterday was our second trip to the cottage for more interior renovations. We removed all of the old linoleum and carpeting and spent most of the day on our hands and knees removing hundreds of nails. When I woke up this morning I could feel my knees buckle.
I assume people put layers upon layers of flooring over these pine floors in an attempt to keep the place warm in the winter, I just don’t understand why someone would go trigger happy with a nail gun to keep the linoleum in place.
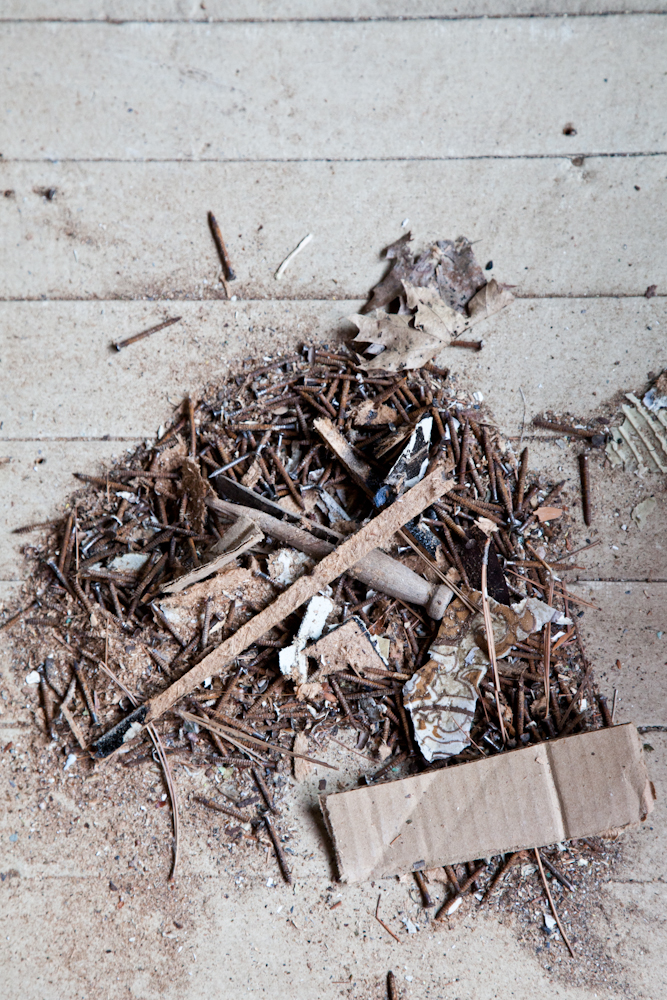
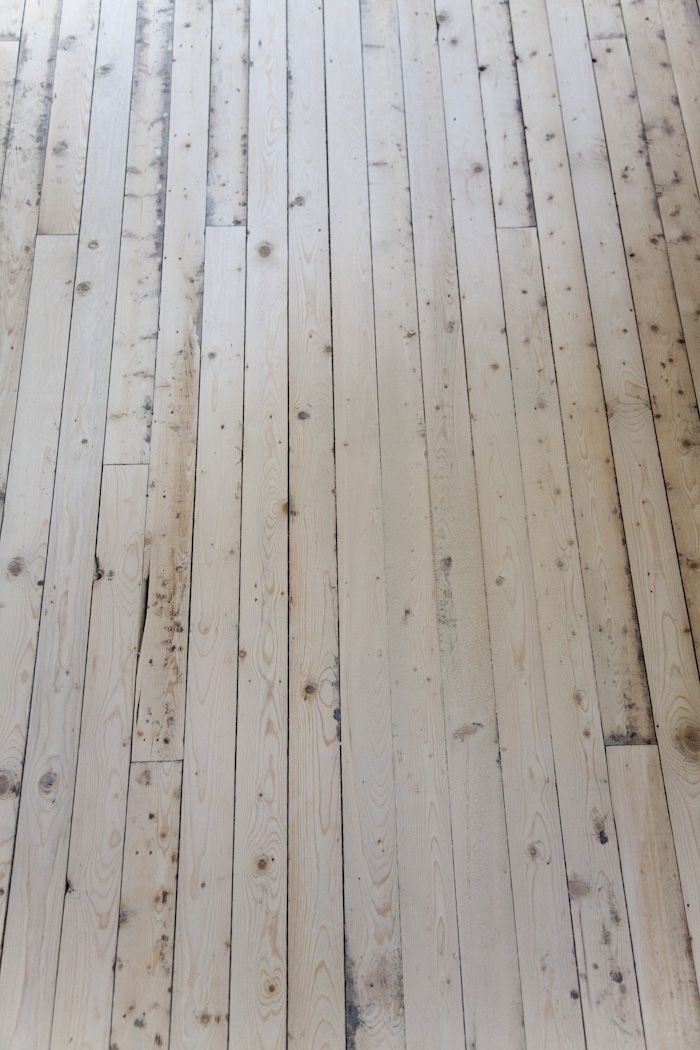
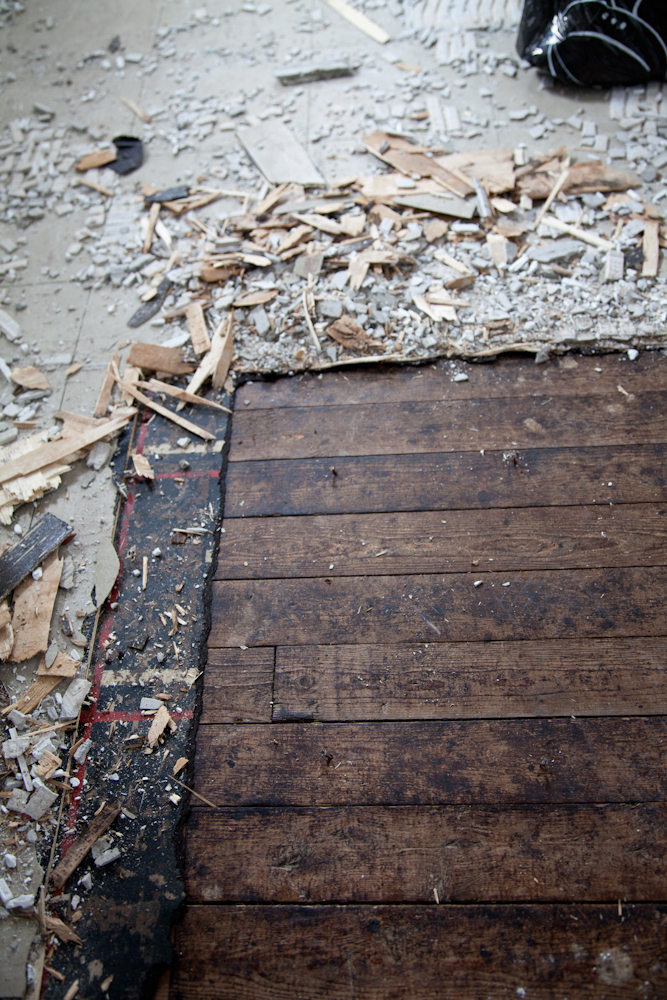
This is about a quarter of one room finished.
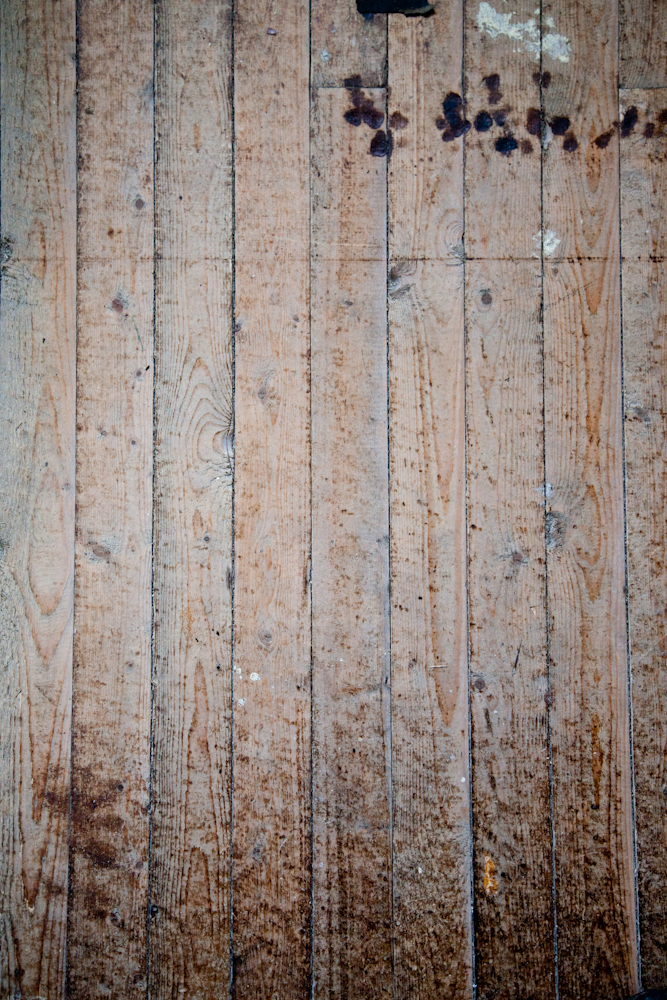
You can start to see potential for some beautiful grain, next week we’re going to rent a belt sander to get rid of this excess gunk on the floor.
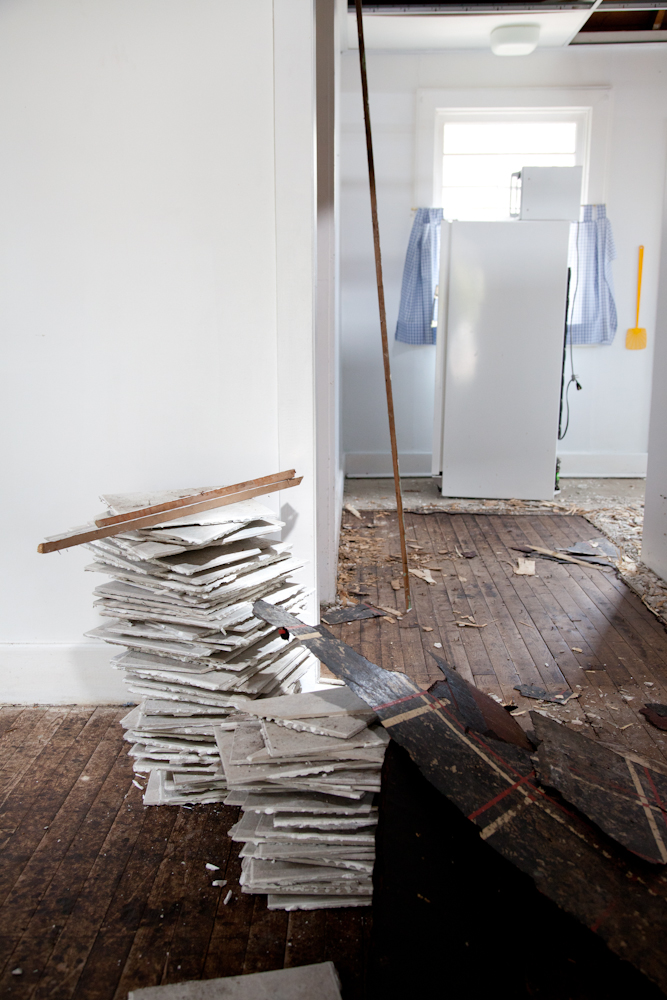
We got a bit excited and starting working on removing the kitchen tiles, something we weren’t sure if we wanted to remove.
It was by brute force the flooring was removed and by far the least enjoyable job we have done since starting. Not only did we have to remove the ceramic tiles, we also had to remove a layer of linoleum which was nailed to a sheet of plywood which was nailed to the floor with a million nails.
Originally I was considering putting in a whole new kitchen, specifically a free standing kitchen to make it less formal and more of a working cottage kitchen with open shelves, and racks for hanging pots and pans. After taking some measurements and mentally placing the kitchen I had in mind I realized my vision just wasn’t going to work. The space was too cramped.
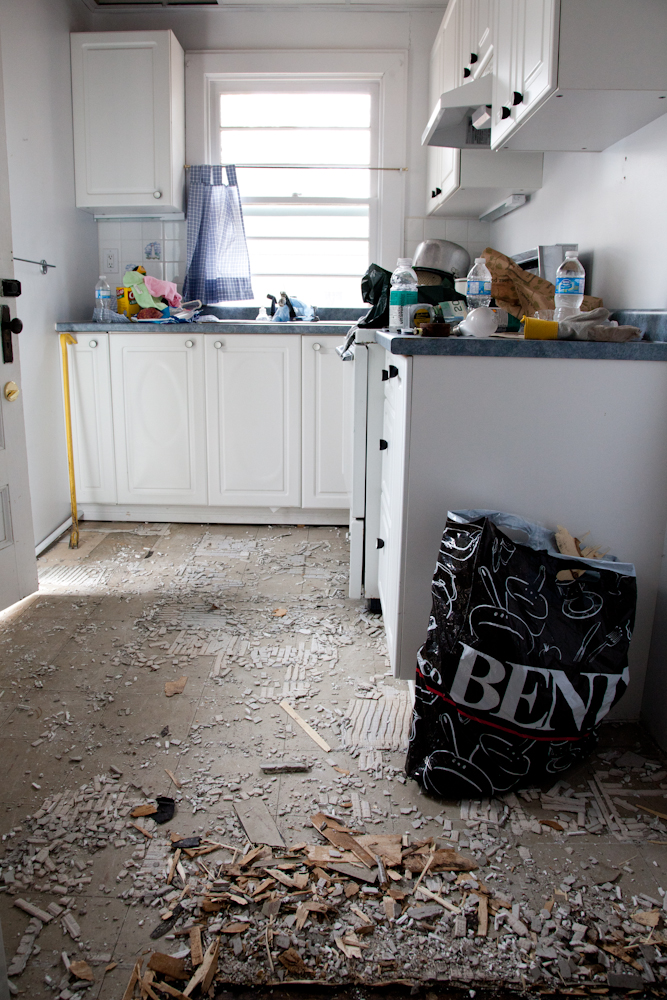
The white kitchen cabinets already in the space are non-offensive, and even though I might have laid out the kitchen differently, the amount of closed cupboard space is very generous. The decision is to replace the tired blue counter-tops with wood and install the white ceramic sink from our old apartment. We’ve already done some updating by replacing the colourful fish hardware with nice simple black and white knobs from IKEA.
Still lots of work to do, we need to replace the office style drop ceiling with pine slats.
Here is that sun room again which we are going to paint the floors white to differentiate from the rest of the cottage. I guess someone else had the same idea because when we lifted up the floor we discovered it had already been painted. Hopefully with a good mop job, we might only have to add a top coat of white porch paint to clean it up.
Guest cottage renovation
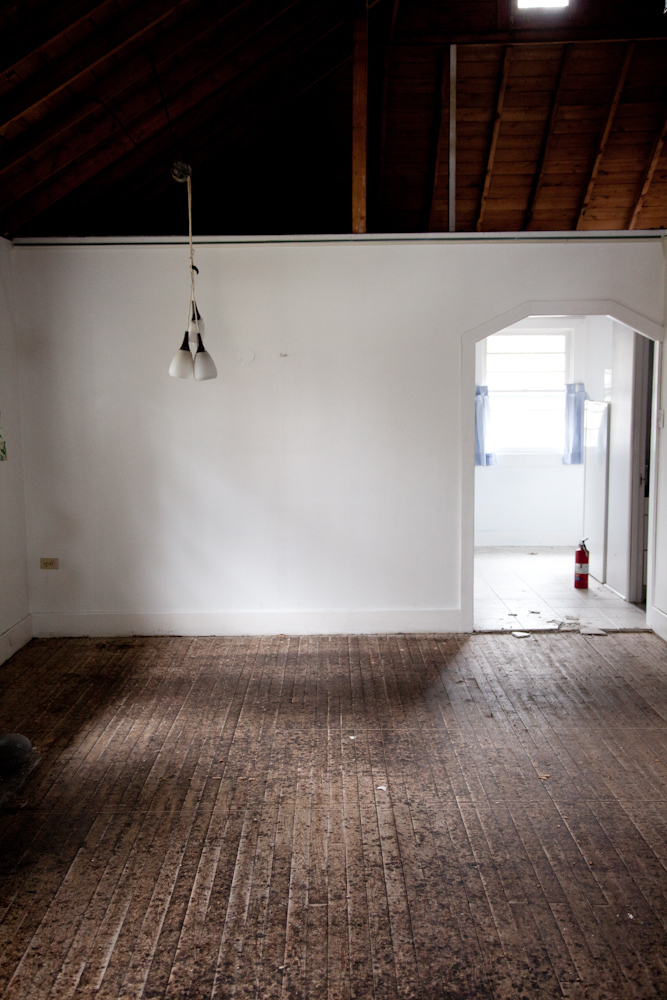
Déjà vu! This was nearly the same opening photo from our first cottage renovation 2 years ago. You may or may not know that our cottage also has a matching guest cottage on the property that used to act as a rental unit when Juli was growing up. During the first renovation we focused on the cottage closer to the lake and it was more than enough to hold ourselves and our friends over the summer.
With the arrival of our baby we decided to start working away at the guest cottage so our friends and family have their own private space. It is going to a be a lot of work, but my brother Frank and I started taking day trips once a week to get the work done.
Our first step was to empty the furniture in the cottage, and box up all of the miscellaneous antiques to be sorted out after the renovation. With the recommendation from our neighbor we contacted a local antique dealer to visit the cottage and make an offer on the contents.
They gave us a reasonable offer and hauled away everything later that day. Originally we were just going to donate everything, but I’m so glad we called these guys, they were really nice and came to the cottage within an hour of contact.
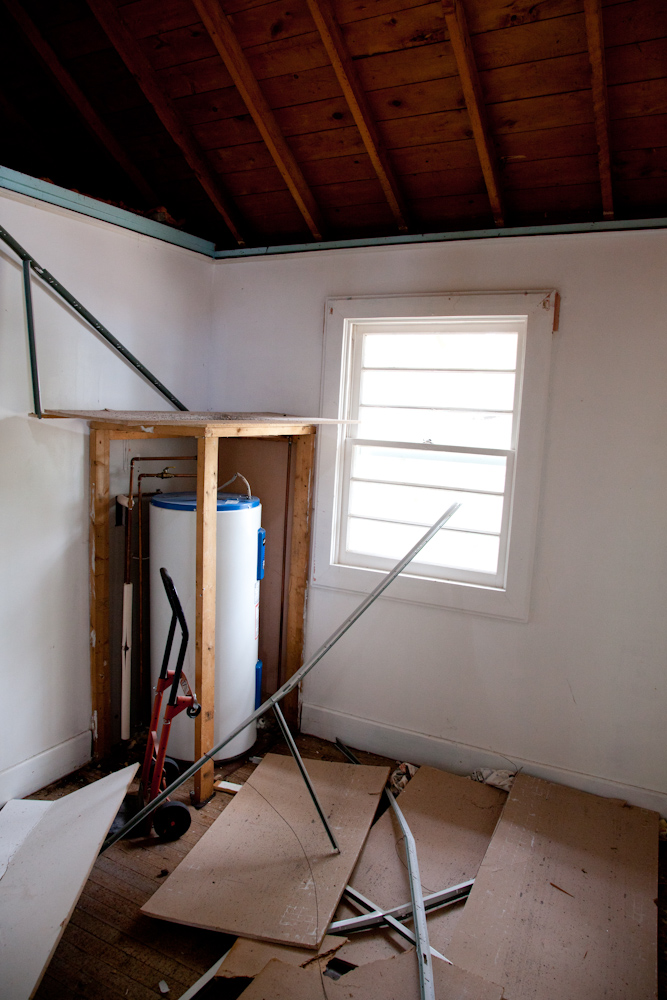
The bedrooms are really tired looking, and all of the windows need an update.
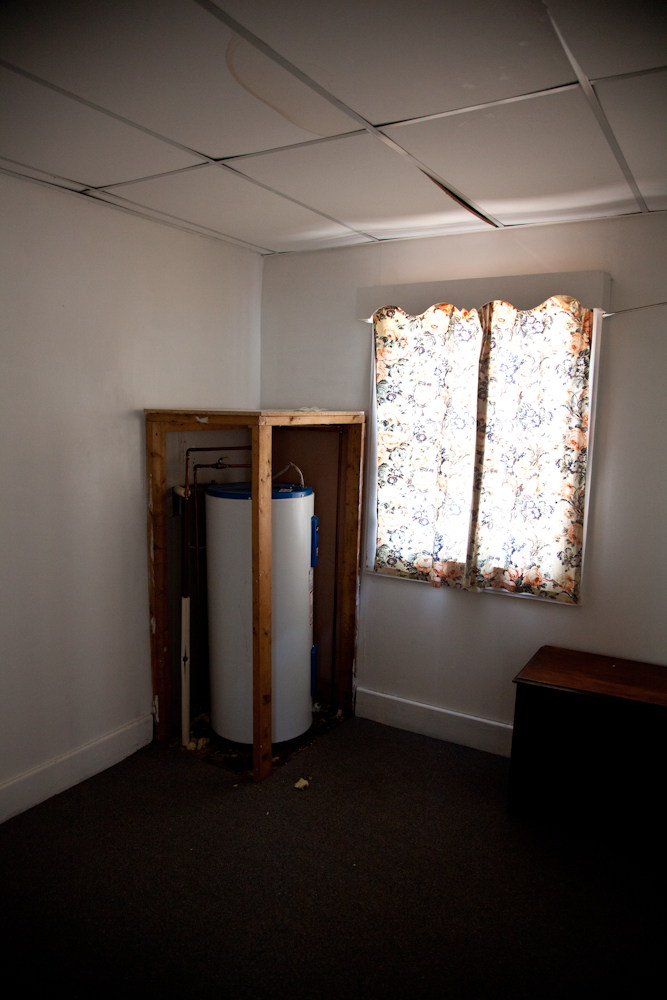
The water tank in one of the bedrooms already has a decent frame around it, I think we’ll panel it up with some nice pickled pine wood.
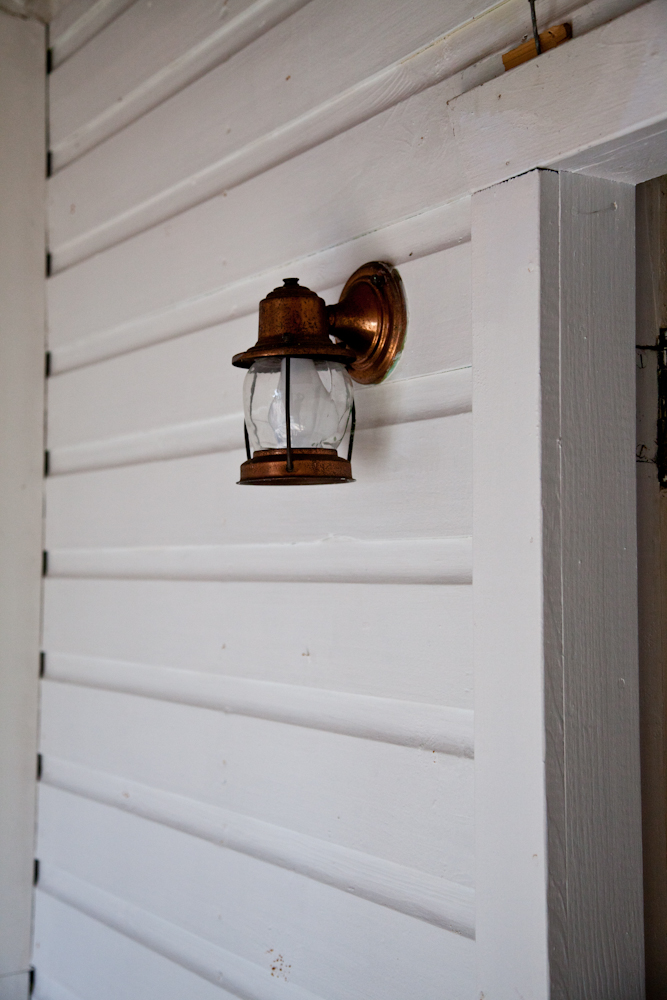
There are some details we are happy to keep, including these beautifully oxidized copper sconces in the sun room. This room is going to be the highlight of the renovation complete with matching daybeds.
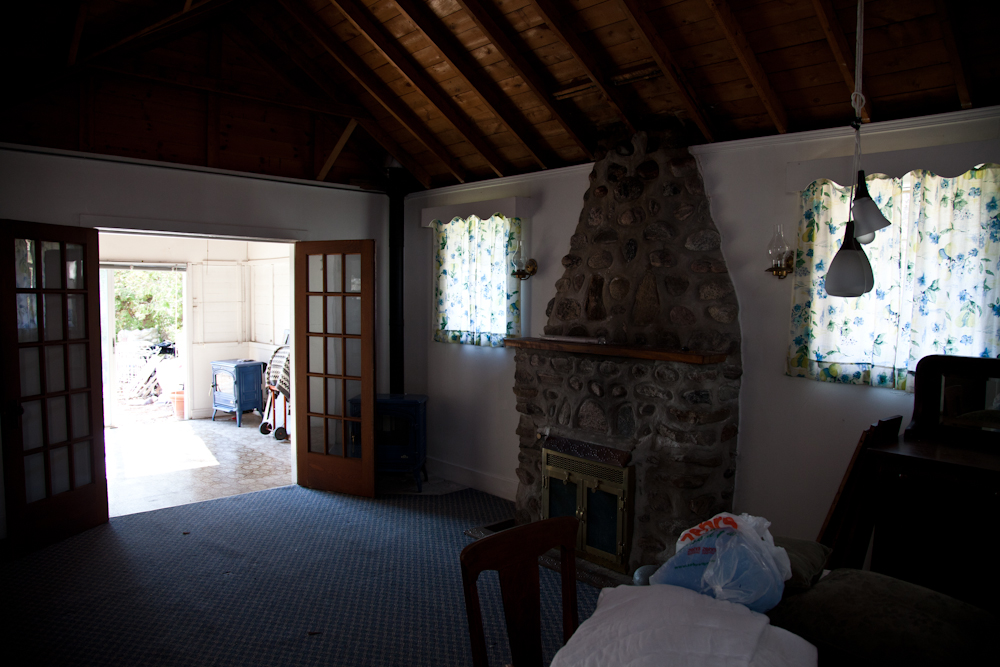
A view from the living room to the sun room.
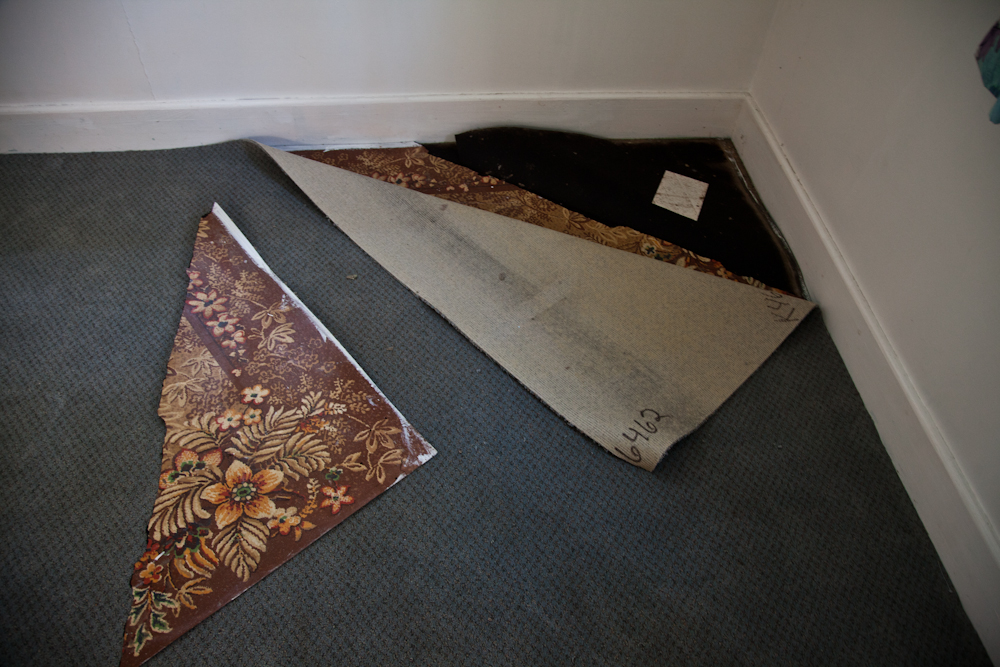
We started pulling up the carpet, which lead to 2 layers of linoleum nailed to the floor with a million nails. Next week Frank and I will be on our hands and knees pulling them up one by one.
We still don’t know if we should sand down the pine floors, and treat them with lye giving them a bleached effect. Of course the other more simple solution is painting them white like the main cottage. Part of me wants this one to have more of a natural feel, as if the cottage was never really renovated, just smartly re-worked in the 60s complete with Aalto furniture, white plaster, and pine floors.
What do you think?
Cottage hodge-podge 2

We’re slowing down any work to the cottage for the rest of the summer. Last year we worked all summer, and even this year we’ve done quite a bit to get the cottage a little more live able for our guests. It was getting a bit silly having the mattresses on the ground so we got some IKEA box springs with oak legs to bring them off the floor.
We installed some Muuto oak dots on the wall to hang clothes and towels.

We replaced the old ugly and broken sconces with AJ wall lights. It made a ridiculous difference and added a bit more modernism to the cottage.

We finally found a place to put our 50s yacht photograph (very George Nelson’s office in the 50s) and hung our MayDay light by Konstantin Grcic.

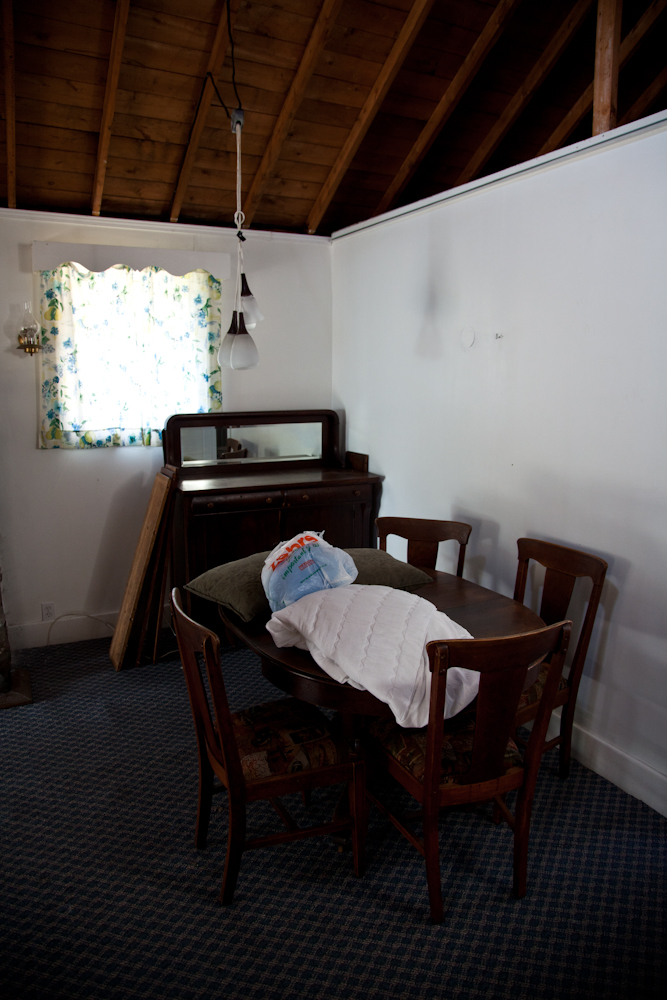
One of best things we found this summer was this beautiful sideboard by Peter Hvidt & Orla M.Nielsen. It’s one of the only cabinets I’ve seen to be made out of solid teak, and will hold all of our dishes and any other miscellaneous things we have that are filling our kitchen cabinets. The legs and tambour sliding doors are really unique, I still can’t believe it’s sitting in our cottage it looks fantastic.
The big apple print is by Italian mid century designer Enzo Mari.

We got the sideboard at the Queen West Antique Centre, which is where we got a lot of the vintage cottage pieces.

Still enjoying the cedar slats. We thought we were going to get a cloudy rainy day but it turned out gorgeous. Lounging, swimming and mass magazine reading.

Juli: I have been wearing the same bikinis since I was in my early 20s. Something had to give, they really are too small. SO, I finally headed over to Sandpiper’s in Yorkville as it’s the only bathing suit store I know of in the city (Bikini Village does not count for even one moment). I fell in love with two retro style suits, one full, one bikini and all I wanted to do was sit around in it all day. Love it. Feels so much better than squeezing into a teeny tiny itty bitty two-piece.

Medium rare steak served over a bed of arugula and Parmesan, drizzled with olive oil.

We were in a pocket of stars and sky while all around us raged thunderstorm war.

In the morning I was cooking bacon with tin foil on the barbecue for breakfast (yes it works and it’s not messy) and our old screen door didn’t close all the way when I went inside to grab my barbecue tongs. I came outside to find Isha trotting around cottage grounds with her feet walking on sandy soil and head moving everywhere trying to take in this big outside world. Luckily when I came to approach her she didn’t take off. I scooped her up and sat down on a chair and let her have a stare fest with the world until she got a bit squirmy, then I brought her inside.
She had a big day, and slept the whole car ride home.
